There are two basic steps to adding reCAPTCHA to Contact Form 7:
- Register your website for reCAPTCHA (Free) and get your keys
- Add your reCAPTCHA keys to Contact Form 7
1) Register your website for reCAPTCHA and get your keys
Sign in to your Google account (e.g. by signing in to Gmail), and then go to the ReCAPTCHA admin Console. You will see the see the screen below. You can also go to https://www.google.com/recaptcha and click on ‘V3 Admin Console‘ link.
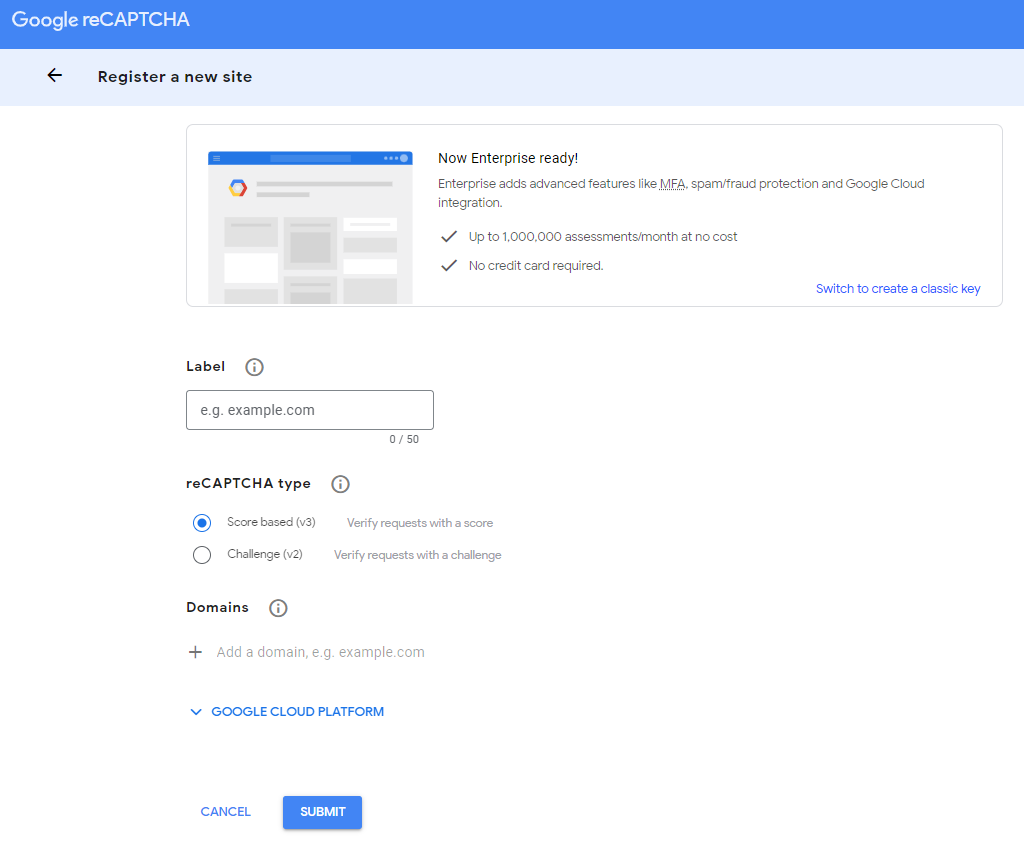
Screenshot of the reCAPTCHA admin console
By default, you will be creating an ‘Enterprise reCAPTCHA key‘, which is free for up to 1 million assessments per month, but will cost you money after that. For small sites, this is usually fine as you will never exceed this limit, but I still prefer to use the free version of reCAPTCHA just in case the terms of the Enterprise version change. If you want to use the free version too, you can simply click on the ‘Switch to create a classic key‘ link, as highlighted in the screenshot below.
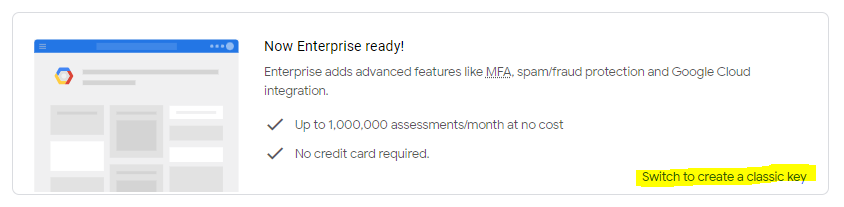
Screenshot of the link to create a classic reCAPTCHA key
You will now need to do three things in order to register your reCAPTCHA:
i) Add a label
The label is simply a way for you to recognise your reCAPTCHA in your reCAPTCHA console the next time you log in. It can be anything you like but most people just use the domain that the reCAPTCHA code is for – e.g. example.com.
ii) Choose your reCAPTCHA type
There are two types of reCAPTCHA currently available. Version 2 (V2) is the older version of reCAPTCHA and requires the user to check the ‘I am not a robot‘ checkbox, or to pass a visible test, like the one pictured below.
ReCAPTCHA Version 3 (V3), is the newer version, where the assessment of whether or not the visitor is a human takes place automatically in the background, meaning the user is not required to click a checkbox or pass a test.
In this example, I will be using V3 because it is the version most people use and the version compatible with the latest releases of the Contact Form 7 plugin.
Note: You can only use ReCAPTCHA V3 with Contact Form 7 version 5.1 and above. You can use V2 with older versions of Contact Form 7. Therefore, you cannot use V2 keys on Contact Form 7 5.1 or above, and V3 on Contact Form 7 5.0 and below.
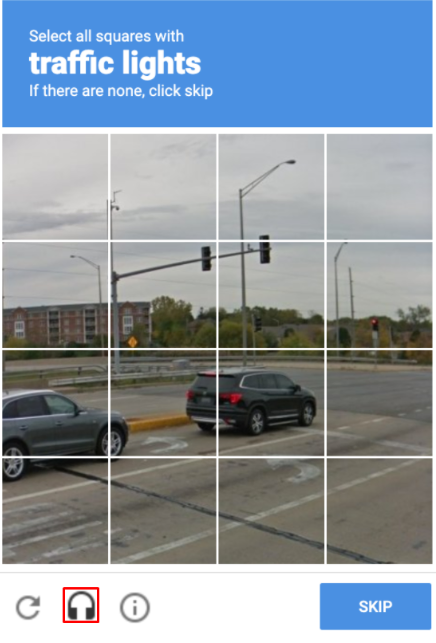
Screenshot of a reCAPTCHA V2 test
iii) Add your website domain
Under ‘Domains‘ simply add the domain that the reCAPTCHA is for – e.g. example.com. Once you click submit, you will be taken to a new page with your reCAPTCHA ‘Site key‘ and ‘Secret key‘ as shown below.
Note: You can choose to use the same reCAPTCHA for multiple domains, and this is why you have the option of adding more than one domain. However, most people will only add one domain here.
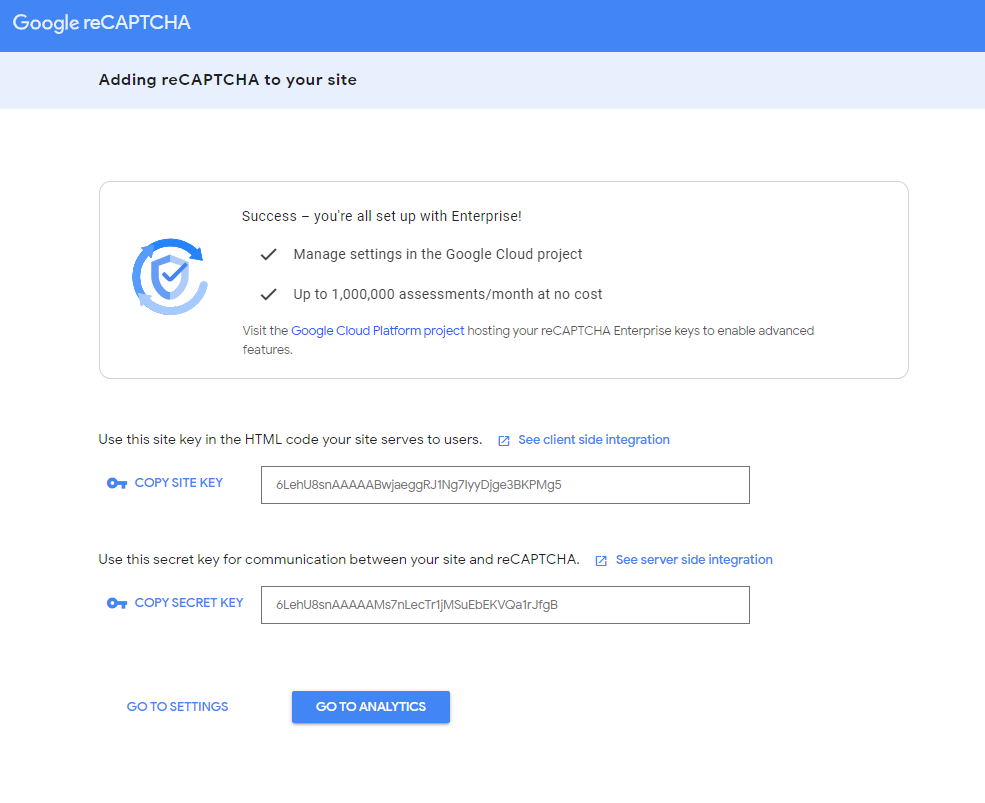
Screenshot of reCAPTCHA Keys
2) Add your reCAPTCHA keys to Contact Form 7
To add the reCAPTCHA to all of your Contact Form 7 forms, go to your WordPress backend (admin page) and click on Contact > Integration as shown in the screenshot below.
Scroll down to the ‘reCAPTCHA‘ box and click on Setup integration.
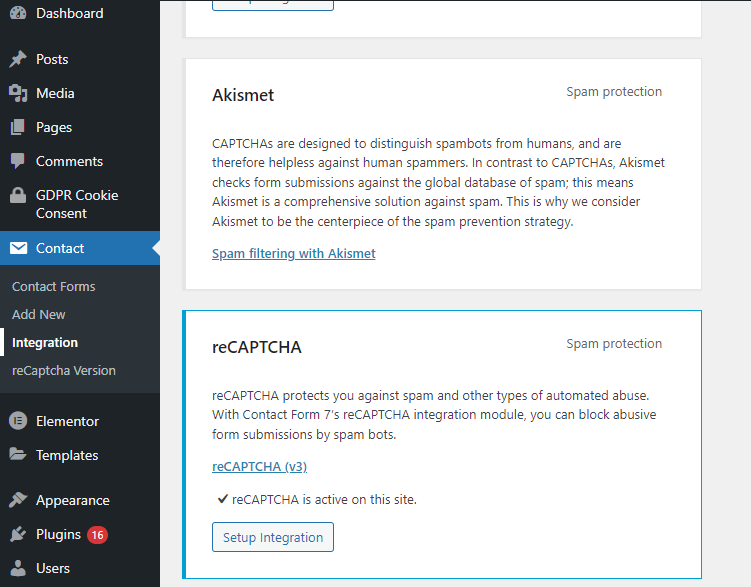
Screenshot of Contact form 7 integration page
The next step is to take the ‘Site key‘ and ‘Secret key‘ from the reCAPTCHA you just set up, add them to the input boxes, and click save, as shown in the screenshot below.
Note: Do not use the keys below. These for example purposes only. Use your own reCAPTCHA keys that were generated in the previous steps.
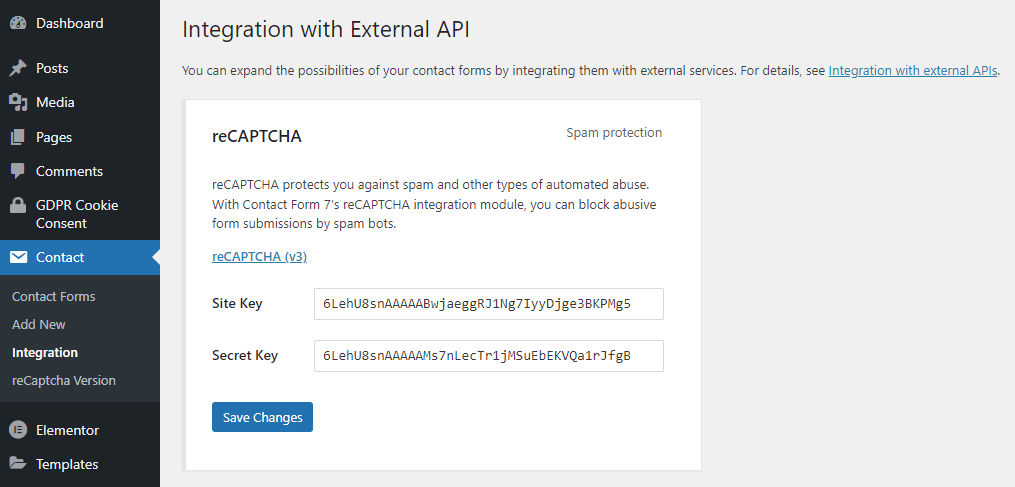
Screenshot of Contact form 7 reCAPTCHA integration page
Once you save your keys, all of the Contact Form 7 forms on your site will be using reCAPTCHA V3 automatically. Now your contact forms use reCAPTCHA’s score to verify whether the form submission is from a human or from a spam bot.
If you were using reCAPTCHA V2, you would need to add [recaptcha] form-tags to each form that you wanted a V2 reCAPTCHA to appear on. This is so the ‘I’m not a robot‘ checkbox appears.
If you are upgrading from V2 to V3, you don’t need to go back in and remove the [recaptcha] form-tags from your forms. If they are found in a form template, Contact Form 7 5.1 or higher ignores them and replaces them with an empty string.
Once you have clicked save you will see a box like the one below, telling you that reCAPTCHA is now active on all of your Contact Form 7 forms.
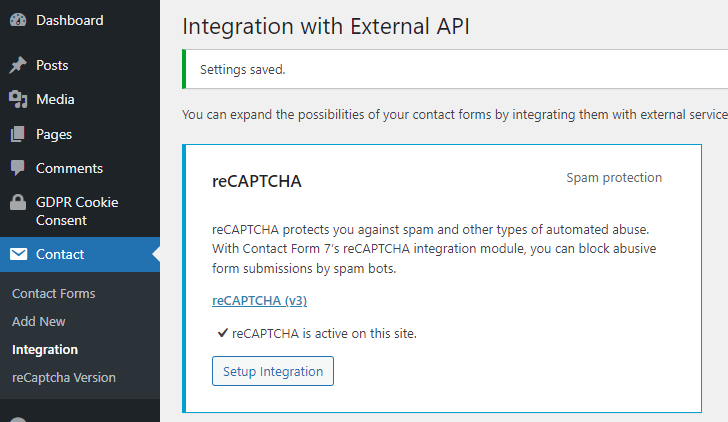
Screenshot of successful Contact form 7 reCAPTCHA integration
So, what do you think? Was this tutorial easy to follow? Did it help you out? Let me know in the comments below!