I recently had to create a custom Google Map for a client, and was surprised at how easy it was to accomplish. I decided it might be useful to other people and to keep as a reference guide.
My client makes his own brand of beer, and the beers are stocked in various bars throughout New York city. He wanted a simple map that showed the various locations that the beer can be bought. Luckily Google maps allows you to create custom maps, with location pins for whatever purpose you desire.
For the sake of this guide, I’ve switched the name of the beer and created my own fictional beer called GoldenBeer. It’s a delicious beer, and it’s quite impossible to get a hangover from it.
This guide is split into the following steps:
- Creating a Google map
- Manually adding locations
- Importing multiple locations at once
- Stlying your map
- Using different layers
- Changing the base map
- Embedding your map on your website
1) Creating a Google map
The first step is to go to My Maps in Google Maps – https://www.google.com/maps/about/mymaps/ or https://www.google.com/maps/d/ and click on ‘Get Started’ (see the screenshot below).
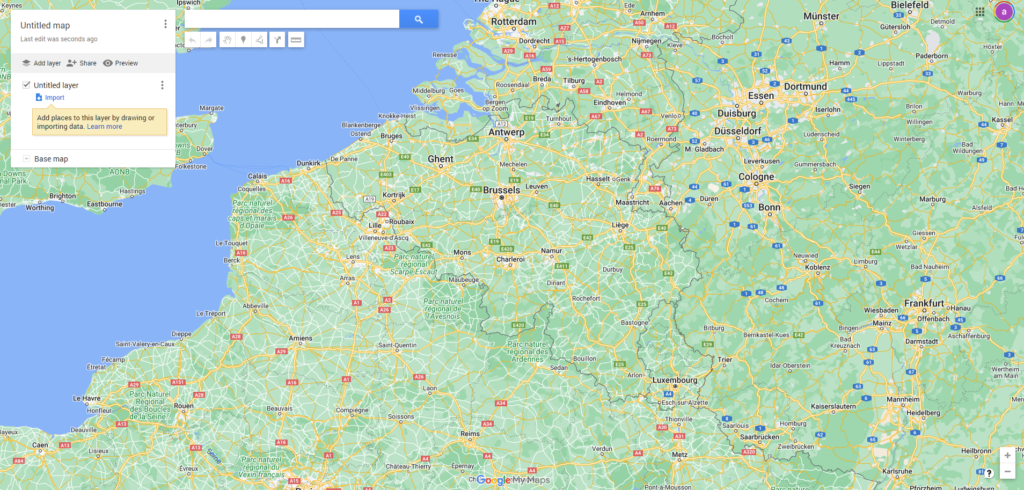
Click on the ‘Create a new map’ button. This will give you a map with the name ‘Untitled map’, and create a layer for you called ‘Untitled layer‘.
As you may have guessed, you can use layers to organise your information. In my case for example, I’ll have a layer for bars that stock GoldenBeer, and a layer for liquor stores (or ‘off-licenses’ in British English) that stock GoldenBeer.
Layers are handy as users can select and deselect layers, making it easier for them to find locations. You can also style all of the locations in a layer at once, giving a visual cue to the separate locations.
You don’t have to do it right away, but you can rename your map by clicking on the current name (Untitled map). This name appears when people view your map, so you might as well rename it something like ‘GoldenBeer Bar Locations‘.
Manually adding locations
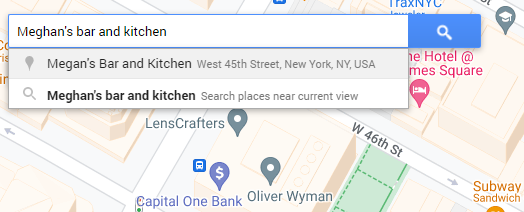
From here, you can manually search for a location (e.g. a landmark or a business). In my case, I’m searching for ‘Meghan’s bar and Kitchen‘, a bar on West 45th Street, New York, and one of the best places to hunker down and enjoy a GoldenBeer on a busy New York afternoon. Type in the location in the search bar and click on the search button.
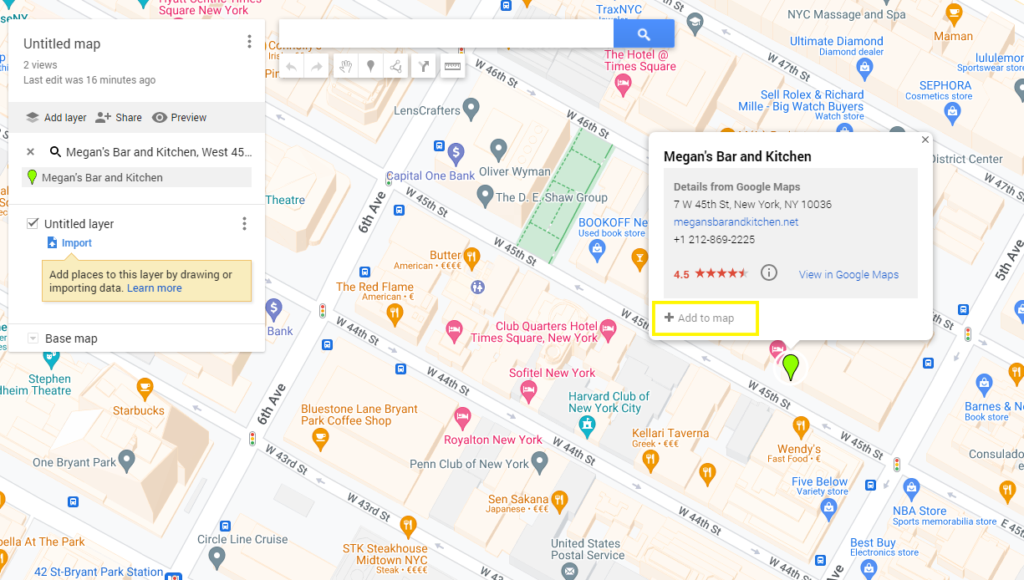
When your location is found on the map, a box will pop up with the location and it’s details. Simply click on the ‘+ Add to map’ text at the bottom of this box (highlighted in the screenshot below in yellow). Repeat this process for as many locations as you want.
Importing multiple locations at once
So what if you have a lot of locations and you don’t want to add them all manually, one-by-one? GoldenBeer is stocked in 100’s of bars and liquor stores, and I didn’t want to type them all in manually; that’d take hours! Well, Google Maps allows you to easily import a number of data-types from various sources. For example, you can upload an Excel CSV file from your computer, or import a GPX (GPS Exchange Format) file from Google Drive.
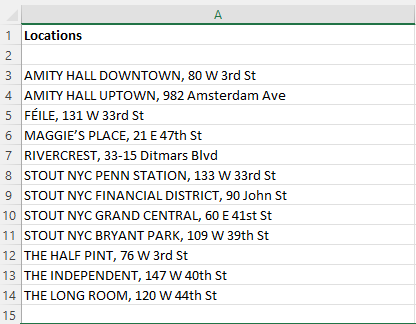
In this example, I’m going to use an Excel file called ‘test-data.xlsx’ with a list of New York bars that stock GoldenBeer. The Excel file contains one column, called ‘Locations‘ and it simply contains a list of the bars name and address in the same field (see the screenshot below).
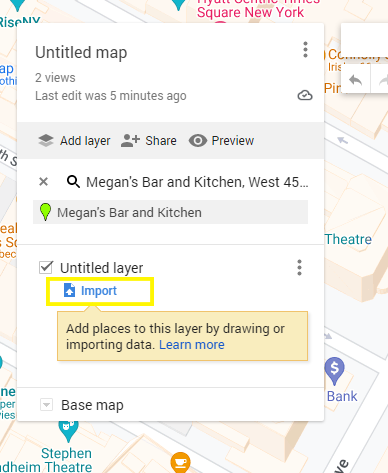
To upload the file, click ‘Import‘ from the modal on the left of the screen (highlighted in yellow in the screenshot below). This will import your locations into the currently selected layer, in this case ‘Untitled layer’ as I haven’t gotten around to renaming it yet.
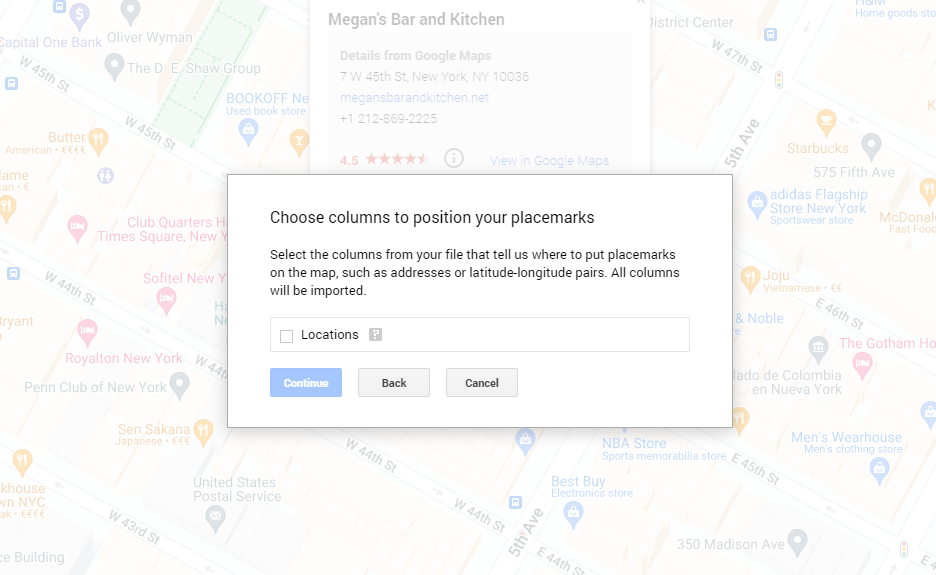
You’ll then be asked to choose which column in your Excel file should be used by Google Maps to find your locations. In my case, there is only one column, so I check ‘Locations’, and then click ‘Continue‘.
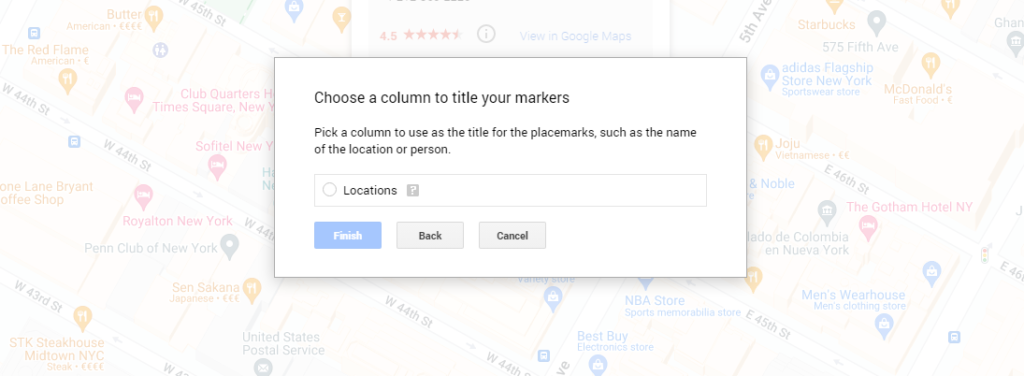
You’ll then be asked to choose a column to use as the title for your locations. My location column only contains the name of the bar, so this is the title of the location too.
*Important note*
As the bars are already in Google maps as businesses, Google maps will use the correct name. However, if you are creating a map with locations that aren’t already businesses or other ‘places’ in Google Maps, you should have multiple columns, such as a ‘Bar Address‘ column, and ‘Bar name‘ column, then of course, you would use the ‘Bar name‘ column, and your custom map would have this as the name of that location.
Place a check beside the column you want to use as the title, and click ‘Finish‘.
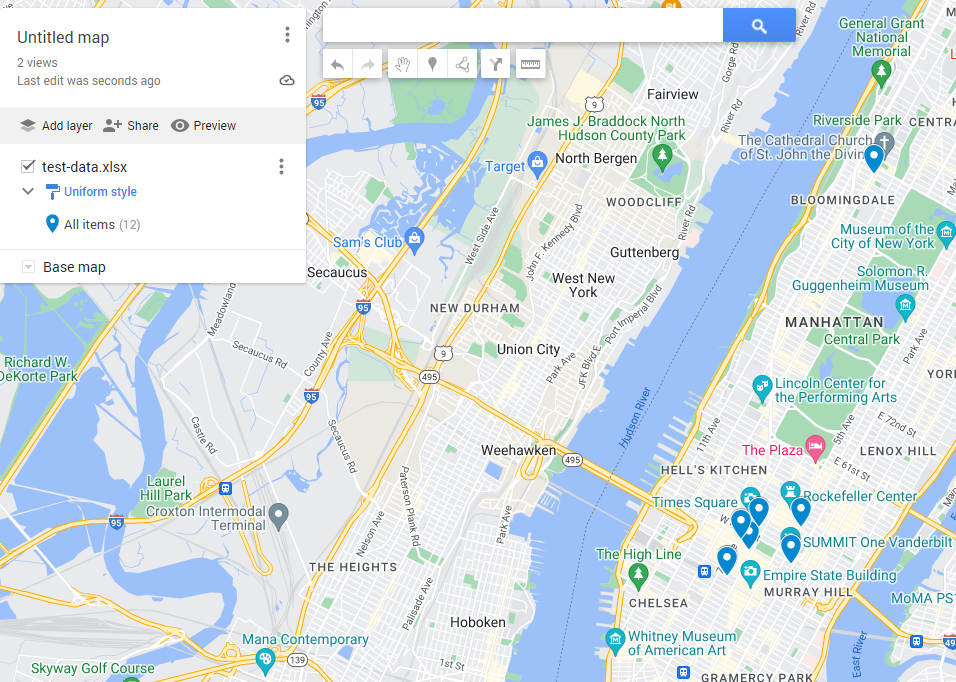
You’ll now see a bunch of pins on your map based on the locations from your Excel file (see the screenshot below). Notice that the left modal shows name of file I uploaded (test-data.xlsx) and beneath that, it shows how many items were added – All items (12).
Styling your map
Now, if you want to use anything but the default blue pin that marks each of your locations, you can easily customise it. If I hover over the ‘All items (12)’ text, a paint-bucket icon appears (see the screenshot below).
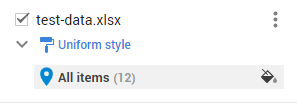
The text above my locations on the left modal that says ‘Uniform style‘, refers to how all of my location pins are styled. This means that I can update the style of all of the pins at once. You can click the arrow beside this text to change the style settings.
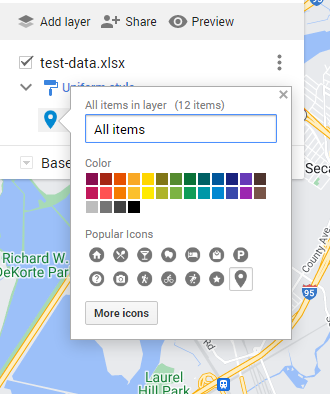
With the style setting on ‘Uniform style’, clicking on the paint bucket makes a colour-pallete appear. From here I can style all of the items at once. I can change the colour of the location pin, use an icon provided by Google Maps, or I can even upload a custom icon via the ‘More icons’ button (see the screenshot below).
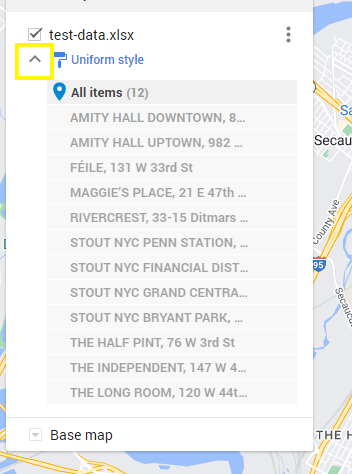
As mentioned above, If I need to style icons individually, I can do that too, by clicking on the arrow beside the ‘Uniform style‘ text, which opens up all of the individual locations (see the screenshot below).
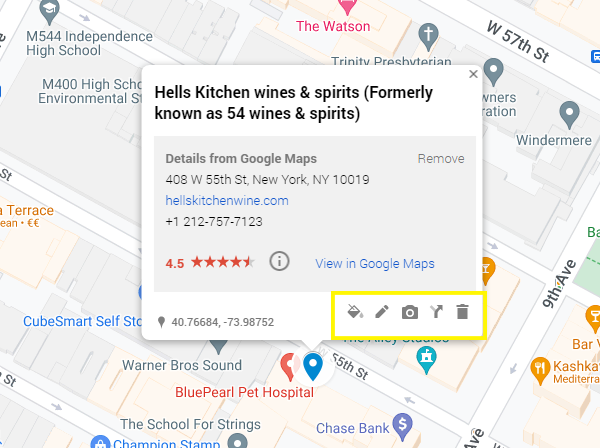
If I click on any one of the locations, it appears on the map, and within the pop-up I can click on the paint-bucket icon to style that location individually (see the screenshot below).
Using different layers
Now, what happens if you have different types of data, or types of place that your product is sold? As I mentioned earlier, in my case, I need to differentiate between bars and liquor stores (off-licenses) so that users can easily tell the difference, and find what they’re looking for quicker.
To do this, I decided to make all of the location pins for bars one colour (blue), and all of the location pins for liquor stores another colour (red).
I uploaded the bars to one layer, and created a new layer for the liquor stores by clicking ‘Add layer’. I then imported an excel of the liquor stores into this second layer, and renamed the layer ‘Liquor Stores’.
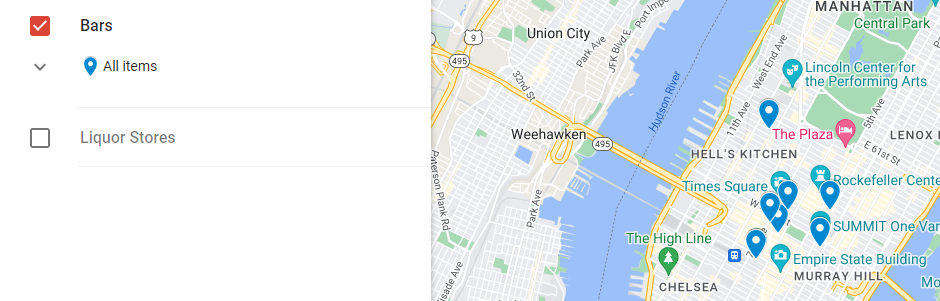
This had a two-factor effect. It allowed me to style all of the locations on each layer at once instead of one by one. In addition, it improved the user experience, because layers can be turned on and off. Users can turn off the liquor stores for example, if they only want to see the bars on the map (see the screenshot below).
Changing the base map
Sometimes you may want to change the colours or amount of content visible on your map (or ‘base map’). The default map contains a lot of landmarks for example, and this may make it more difficult for users to see your locations.
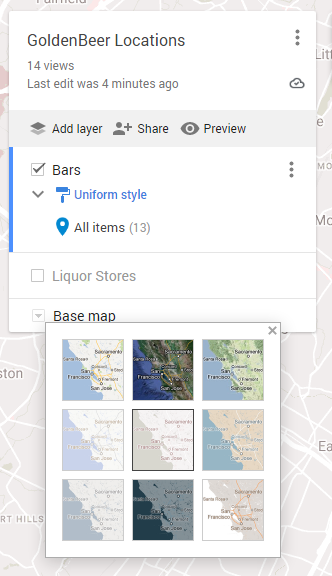
A solution is to change the ‘Base map‘. This setting is found at the bottom of the left modal, and there are currently 9 options to choose from. Simply click ‘Base map’ and choose one of the options to see what your map looks like with the new background (see the screenshot below).
Embedding your map on your website
So now you have created your map. How can you show it to people? Or even use it yourself at a later date?
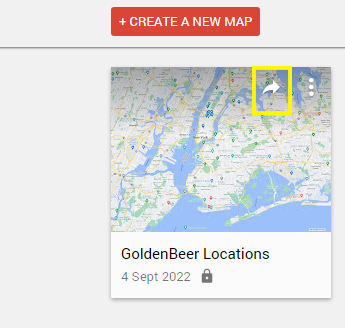
Simply go to your maps dashboard (https://www.google.com/maps/d/), locate the map you created, and click on the share icon (see screenshot below). From here, choose the last option ‘Embed on my site‘.
A popup modal will appear containing the HTML you need to embed on your site (it’s an iFrame). Copy the contents and paste this into your website.
- If you’re using the WordPress block editor, use the ‘Code‘ block for this content.
- If you’re using the plain old WordPress WYSIWYG editor, then use the ‘Text‘ tab (beside the ‘Visual’ tab where you input content).
- If you’re using the Elementor page builder, use the ‘HTML’ element.
- Other page-builders will also have a block/element that allows you to insert HTML.
So, there you have it. That’s how you can create a map with multiple map markers. In this case we used it to show the locations that a product is sold, but this is one of the many uses for a custom map. What will you use your custom Google map for?